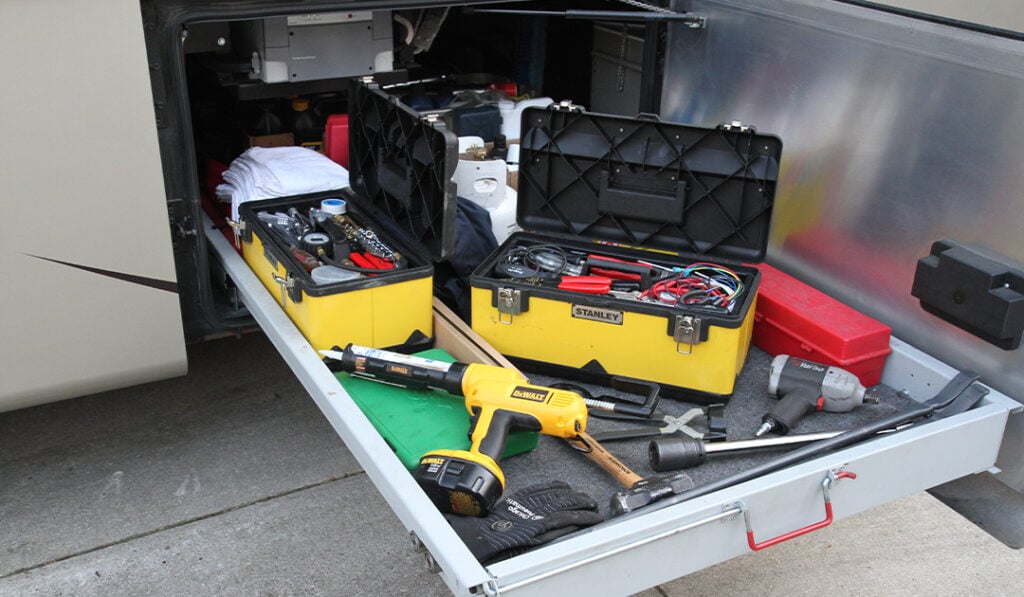
Tools. We don’t always know precisely how to use them or sometimes, even what they’re for. But we’ve gotta have ‘em! Whether you’re a self-described “handyman” or don’t know a socket-wrench from a chisel, it’a a good idea to carry some essential tools in your RV for whatever bumps in the road you may encounter. With that, let’s take a look at some basic tools, what they’re for and how we might save ourselves a trip to the mechanic.
Naturally, anything with “power” is best. Power tools are often preferred as they A.) get the job done more quickly and easily, and B.) make you look pretty cool using them. Cordless power tools are perfect for RV owners because they can be used anywhere as long as their batteries are charged (which of course they never seem to be when you need to use them). Cordless tools have come a long way over the years and there seems to be a wager amongst cordless tool manufacturers to constantly improve them with more power.
Occasionally though, there are some tools that can be a real lifesaver, so it’s best to plan ahead. Most RVers have a socket set, wrenches, screwdrivers, a multimeter and other basic hand tools but there are those extra tools that can really make the difference. In some cases, it speeds the job and saves effort, while in other instances you just plain need it or you aren’t going to be able to get the job done. I can think of a number of tools that I own that fit that category. I’ve been using tools personally and professionally for over 50 years so obviously I’ve accumulated quite a few over time.
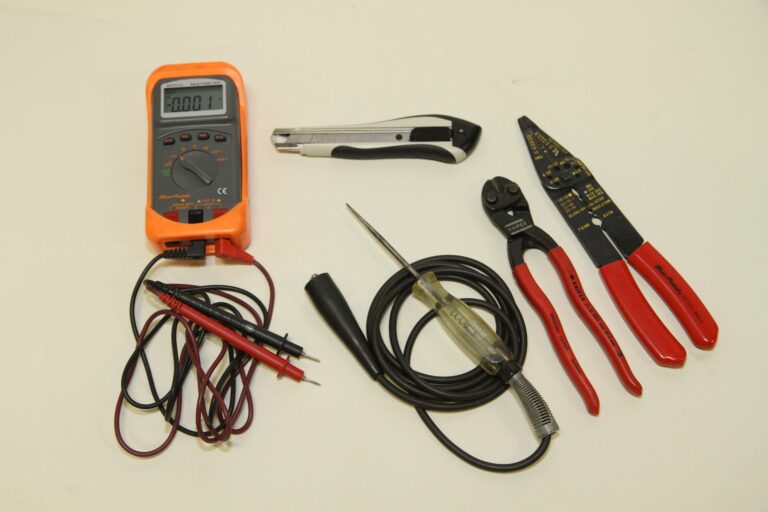
A multimeters can be accompanied by a few basic tools to handle electrical repairs
You can’t carry every tool that you might ever need or else there won’t be any room for anything else in the coach. The key is to understand what issues are most likely to happen and prepare for those events. You also need to keep in mind what your mechanical abilities are. If certain repairs are beyond what you are capable or willing to do, then your best tools will be a credit card and good road-service plan. But there are a lot of minor issues that tend to happen in any RV and most anyone can take care of those small issues. You don’t want to have to call road-service just because a cabinet door fell off. A quick twist of a screwdriver and you are all set.. Therefore, I’ve broken down potential tool kits into three levels to help you decide what tools you will need to carry in your motorhome.
Level One – Basic Tools
This level is a basic level that I recommend for every RV owner. Simple and easy repairs can alleviate many annoying issues, some of which can even sideline your trip. An RV experiences more stress than a sticks-and-bricks home and the condition of many of our roads tends to vibrate all sorts of things loose. A quick repair with a screwdriver or wrench and what was about to fall off is now reattached and you are back in business. It may be a permanent fix or just a temporary repair that enables you to get back on the road until it can be properly repaired.
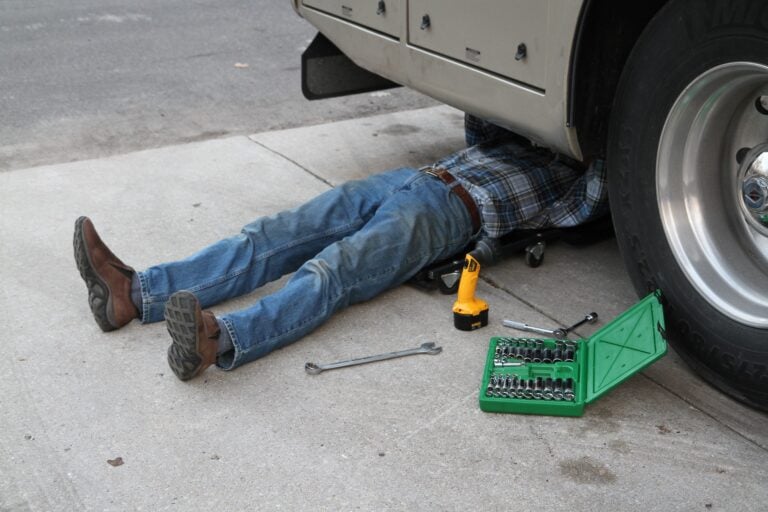
First off, no one should ever leave home without a big hammer. I don’t mean a 16 oz claw or ball peen hammer. When I got my first job as a diesel mechanic my service manager saw me looking at hammers at a local hardware store and handed me a 4 lb. sledgehammer with a 16” handle. He told me that was the one I wanted and to forget about the smaller ball peen hammers. You can always hit lightly with a big hammer but you can’t hit hard with a light hammer. That was good advice and I now have a number of “war clubs” close at hand wherever I am.
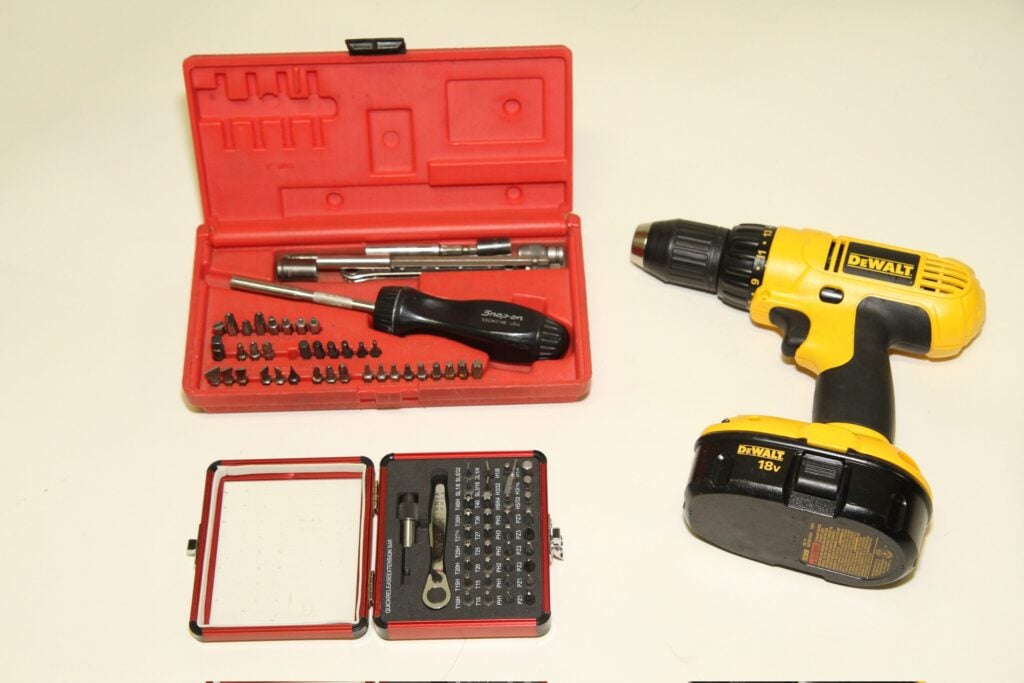
Perhaps the most common tool is a screwdriver, but there are a wide variety of screw head styles. You may have slotted, Phillips, Torx, socket head or Roberts (square drive) screws. Rather than carry a number of screwdrivers to cover this range, I recommend a screwdriver with replaceable bit tips that are inserted into a magnetic holder, which helps to prevent the screw from falling off the tip. They often come in a case that holds the driver as well as a wide selection of ¼” hex bit tips. Many of these drivers are available as ratcheting screwdrivers which makes it easier and more comfortable to use. The case usually has room to add extra bits, sockets and adaptors that didn’t come with the kit as needed. A drill chuck adaptor allows you to use your bits with a cordless drill or impact driver, which makes the job easier and quicker. While you can’t use it to pry things like you can with a regular screwdriver, it does offer a minimalist approach rather than having to invest in a large assortment of screwdrivers. Personally, I carry a set like this which is my go-to tool for many repairs. But I also have a few regular screwdrivers in case I need to open paint cans or pry something.
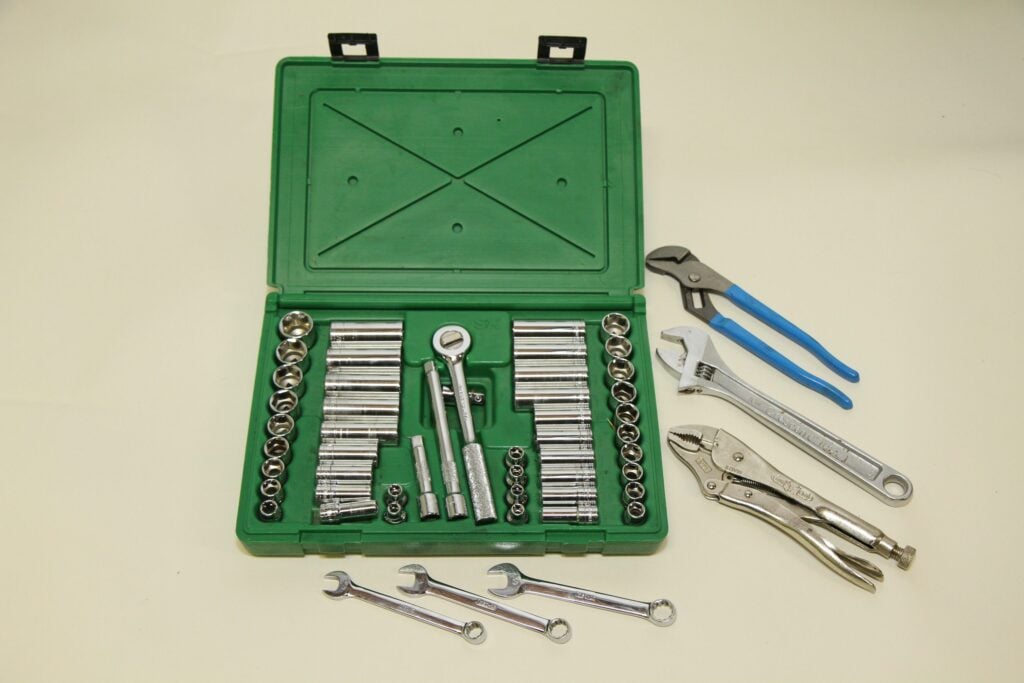
A socket set with both SAE and metric sockets in 3/8” drive will handle most needs.
Screwdriver kits with replaceable bit tips can greatly help to conserve precious cargo space over a complete set of dedicated screwdrivers. The various bit tips can be used in right angle ratchets or power tools as well as the normal ratcheting screwdriver handle.
Another handy item I’ve acquired is a Sunnex 38-piece mini ratchet and bit set which features a super compact ratchet that holds the same ¼” hex screwdriver bits that fit my interchangeable bit screwdriver set. It has gotten me in and out of tight spots that even a stubby screwdriver is just too tall for. The selection includes hex key and Torx bits as well as every other bit that you could imagine. With this, plus my Snap-On interchangeable bit ratcheting screwdriver, I’m virtually unstoppable. If those two tools can’t get the screws out there’s always that four pound hammer and a chisel.
Wrenches are always a mandatory item. Combination wrenches with both open and box ends give you the ability to use either end on a bolt head or hose fitting. You don’t need to buy the largest set because most repairs will be in the ¾” or less sizes. Adding a 12” adjustable wrench fills in for odd or larger sizes, or when needing a second wrench of the same size. Socket sets are another must have item. For a basic set, a 3/8” drive combination set that includes both metric and fractional sockets in both standard and deep well sizes will cover 80% of your needs.
Pliers are another area, although they often are misused where wrenches should be employed. A good vise grip pliers can grab a bolt with a rounded-off head, turn a pipe fitting or be used to bend a metal tab. Large channel lock pliers can be used on seized garden hose fittings or other larger items that need some grip. A needle nose pliers can be used to grip small objects and a diagonal cutter will cut wire or nylon cable ties with ease.
Now that you have that large hammer, it would be a good idea to accompany it with a few related items. A chisel will allow you to snap off bolts that just won’t turn loose while a crowbar can be used to pry things that are too large for a screwdriver – such as a frozen wheel rim. Throw in a nice utility knife with replaceable blades and your tool kit is starting to come together.
Keep in mind that the majority of issues in an RV are electrical. You can’t tell what’s wrong unless you do some diagnostics, so a simple multimeter should be in every RV owner’s toolbox. You can use it to check for AC voltage at the campground pedestal or test for dead electrical circuits in the RV. They can also be used to test DC circuits so you can tell if you have power at any switch or fixture, check your battery voltage, etc. The third most used feature on a multimeter is testing resistance. You can measure how many ohms an item such as an electric heating element has to determine if it has failed or is fine. It can be used to test fuses or for continuity in light fixtures or any other electrical device. Then, to correct any faulty wiring, be sure to carry a handful of crimp style wire connectors and a multipurpose wiring tool that can be used to correct the problem.
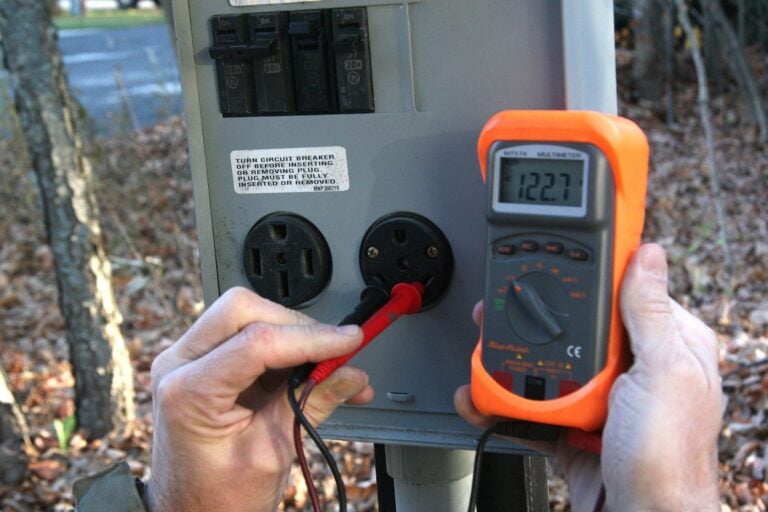
Multimeters can be especially useful when testing power pedestal voltage.
Lastly, a few mandatory items in any basic tool kit are a tire pressure gauge and filter wrench. Checking tire pressures is one of the most important tasks to perform on an RV and needs to be performed frequently, so invest in a good quality unit. Mechanical units with the trucker’s foot to reach inner duals are fairly reliable and accurate digital units with a flexible hose are now available at reasonable prices.
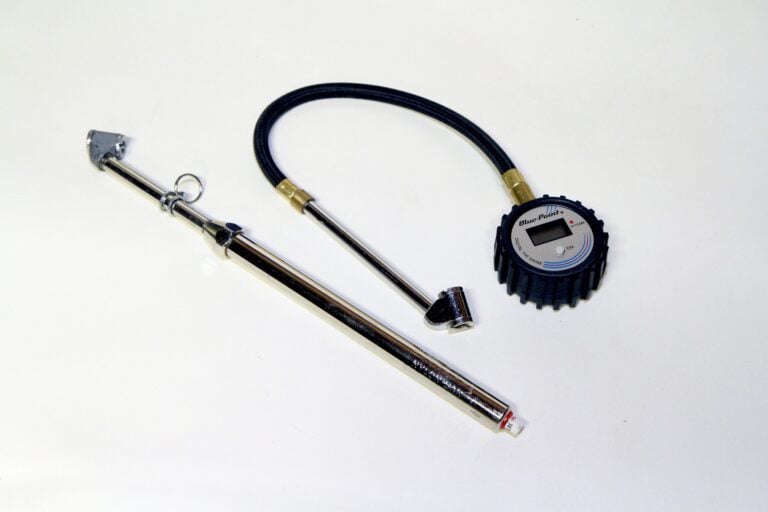
Tire pressure gauges come in digital and mechanical versions and should be found in every motorhome owner’s tool kit
You are probably not going to be changing your own oil when traveling, but if you drive a diesel motorhome you run the chance of picking up a batch of bad fuel that has water in it. If that occurs, you may need to change your fuel filter. It’s always a wise choice to carry a spare fuel filter along with you but you will also need to carry a filter wrench so that you can replace the filter, should you need to. Filter wrenches come in various sizes so be sure to buy the correct one that will fit your filter.
A beginner’s tool kit like this won’t break the bank and won’t require a large toolbox. Many of these items will come in small blow-molded plastic cases that can be stuffed anywhere without seriously impacting your storage space. Flat wrenches and pliers can be stored in a roll-up pouch or a small toolbox.
Level Two – Intermediate
This level is for anyone with a bit more of a DIY attitude who wants to do more than a quick repair to get going. Some more detailed permanent repairs will require a few more tools than in the previous selection.
You can start out with more sockets. The basic 3/8” drive set mentioned earlier is a good start but if you want to handle smaller nuts, you’ll need a small compact ¼” drive set. If you plan on working on your chassis, you’ll want to consider a large ½” drive set. You’ll also want to add more combination wrenches. Sizes such as 15/16” and 1-1/8” are common sizes for the larger bolts. A large 12” or 15” adjustable wrench can be used for any other sizes. Keep in mind that you may need duplicates in the common sizes, such as 7/16”, 1/2”, 9/16”, and 3/4” so that you can remove hose fittings or hold a bolt with the same size nut. You may even want to get those in ratcheting box combination wrenches to speed things up.
This is also the time to start adding power tools. After all, who doesn’ like power?! A cordless drill and drill bit set are a must and can also be used to drive your screwdriver bits or small sockets. Cordless tools are also part of a system so you can add an LED work light and cordless screwdriver or impact driver from the same family and share batteries and chargers. Cordless impact wrenches are also nice, but keep in mind that they won’t have the kind of power it will take to remove tires on a class A motorhome.
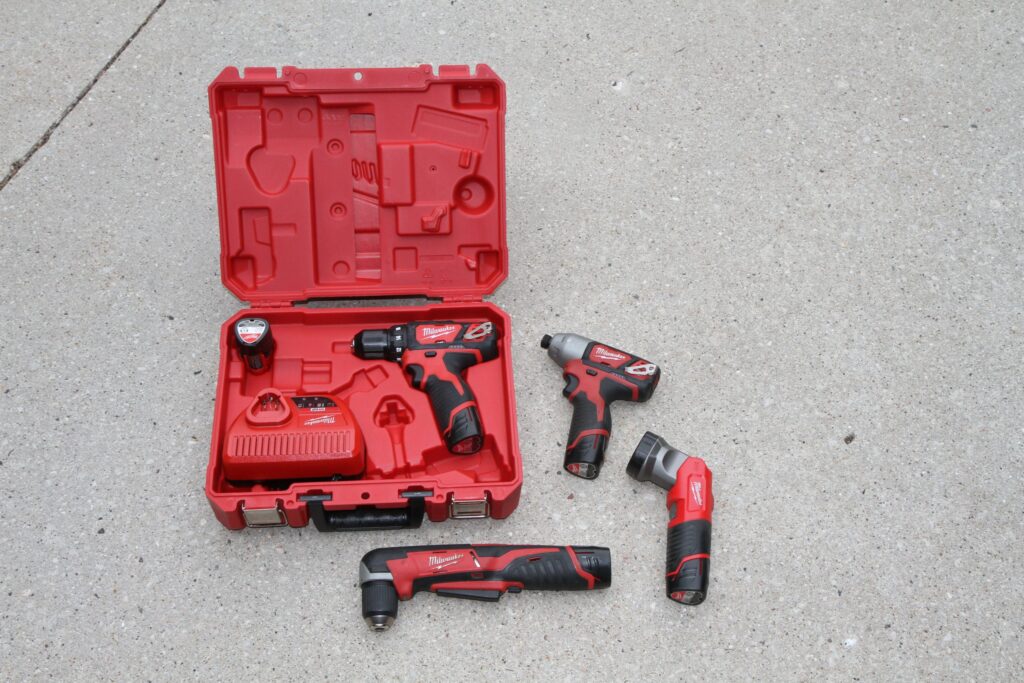
Cordless tool systems can use a single charger and multiple batteries to power a wide array of tools. This Milwaukee M12 system is compact, yet powerful and my personal choice for carrying in the RV. It includes a drill, impact driver, right angle drill and LED work light.
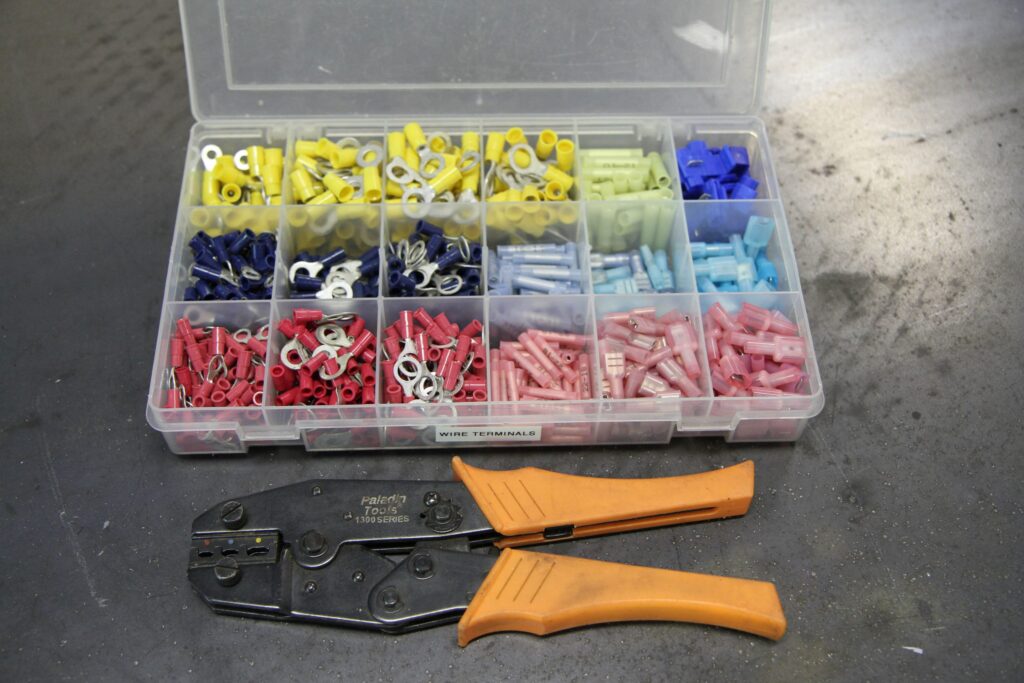
A selection of wiring terminals, along with a good quality barrel crimping tool will allow you to make good connections that are secure and will not fail and come apart.
You can also make your life easier with better wiring tools. After all, electrical issues are generally the biggest gremlins that occur in an RV. It may be faster and easier to just grab a 12-volt test light to test a fuse or circuit rather than bring out the multimeter. Carrying a small kit with an assortment of wire terminals is a plus. While the basic multipurpose wiring tool can cut and crimp terminals in a pinch (pun intended), replacing the multipurpose crimper/stripper/cutter with a quality barrel crimper, diagonal cutters and wire stripper will make for better quality repairs and less hassle when making them. For connections that need to be sealed against the elements, heat shrink tubing and a heat gun will prevent those connections from corroding.
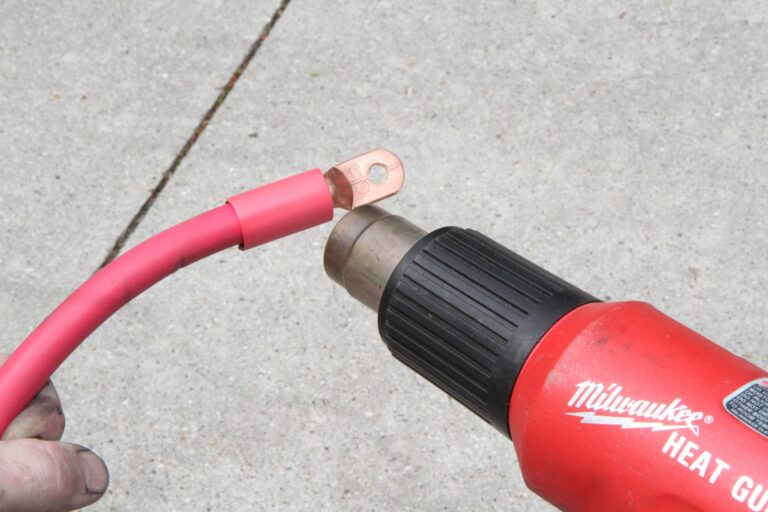
An electric heat gun is handy to heat up polyolefin shrink tubing or thaw out frozen water lines.
Radiator coolant needs to be checked for freeze protection level and if you have flooded batteries, you may need to check each cell’s specific gravity. You can buy a pair of hydrometers to accomplish this but they are bulky and can break easily. Rather than carry two hydrometers, I suggest buying a refractometer instead. A refractometer is compact and super accurate because it doesn’t require temperature compensation. It’s also less apt to break and one refractometer can handle both battery electrolyte levels as well as coolant freeze levels. Besides, you look pretty slick using it, so you always want to bring it out when you have an audience for the best effect.
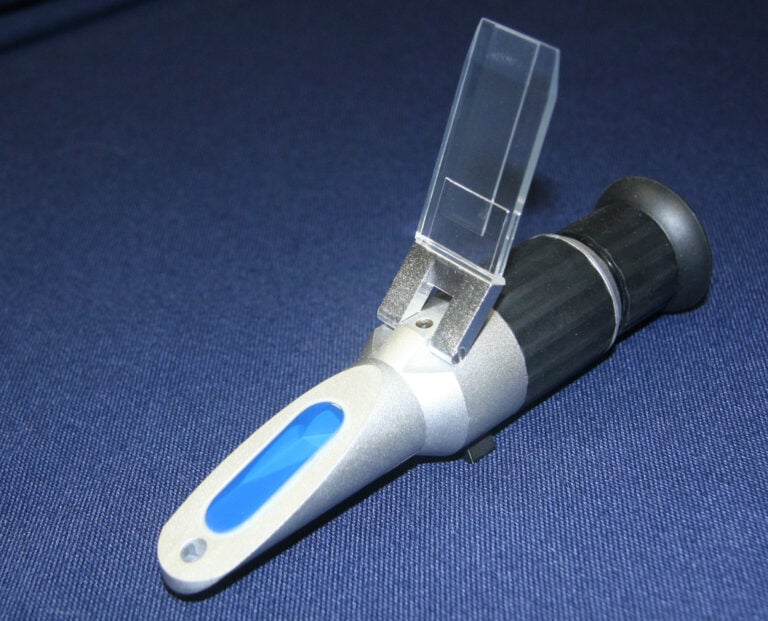
A refractometer does double duty in that it can check your battery electrolyte charge level as well as the freeze level of your engine’s coolant. It’s much smaller and more accurate than a hydrometer and less prone to breakage.
Finally, a caulking gun and some tubes of silicone and self-leveling caulk are a wise choice to carry. If a leak appears, you can reseal it correctly rather than reaching for the duct tape. Best to include a scraper to remove the old sealant as well. Still, don’t forget the duct tape or Eterna bond which can be a miracle worker in some situations to get you out of a bind. If at all possible, take a look at a cordless caulking gun which will eliminate all of the squeezing that your hand needs to do when operating the gun. The end result is that you get a more consistent bead and your hand doesn’t feel like it’s ready for carpal tunnel surgery when you’re done. I use a Milwaukee M12 series cordless gun that interchanges batteries and chargers with my drill, screw-gun and LED light.
Level Three – Advanced
If you really enjoy getting your hands dirty (better add some good waterless hand soap to the list!), you’ll need even more tools. At this point, the law of diminishing returns comes into play. The tools are going to cost more and you are going to use them less often than your basic tools. But if you want to do whatever task they are designed to do, you’ll need them. Even if you don’t use them, it’s cool to be able to say you own them.
A clamp-on ammeter will increase the functionality of your multimeter, although dedicated units are also available that are much easier to use and don’t require zeroing like the multimeter accessory clamps do. You can use them to check DC circuits, including battery cables, as well as AC circuits. For 120-volt AC circuits you’ll also need a breakout adaptor that you can plug into a receptacle so that you can clamp individual wires of a power cord. This will tell you how many amps are passing through a given electrical circuit by clamping the probes around the conductor. My ammeter was available with a standard 20 amp adaptor but I also made a pigtail with a pair of 50 amp plug and socket connectors so that I could check how many amps were coming from a campground pedestal.
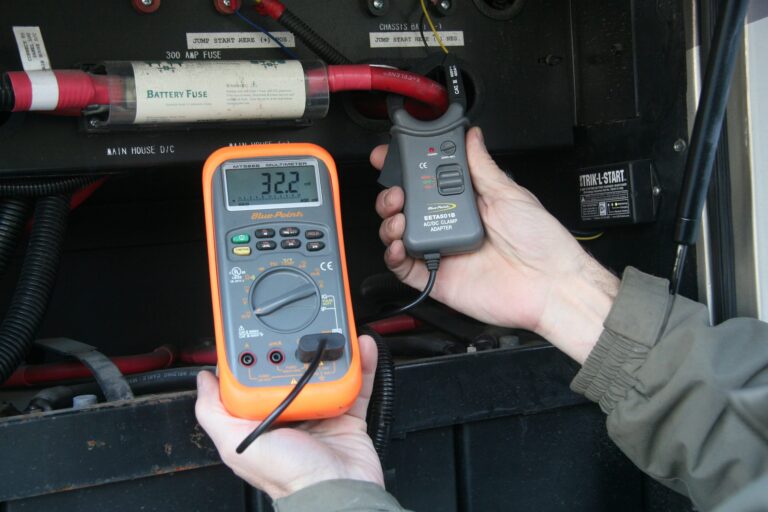
A clamp-on ammeter allows you to measure current flow in electrical circuits or battery cables.
Another great item is a good torque multiplier. The lug nuts on a typical diesel pusher are torqued to 475 ft-lbs and it takes more than that to break them free once they’ve been on for a while. Applying all of my weight to a socket with a 5’ long bar only results in my feet coming up off the ground. With a 6:1 torque multiplier I can easily remove them with my ½” drive breaker bar. It also lets me use my ½” drive torque wrench to comfortably torque them back up to 475 ft-lbs.
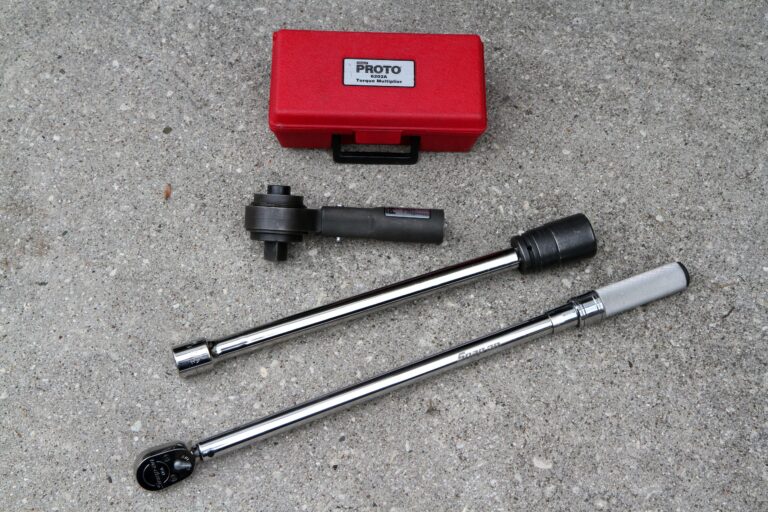
A torque multiplier makes it much easier to remove and replace lug nuts with minimal effort. The torque wrench ensures that the lugs are torqued to the correct torque specification.
Never use an impact wrench on a torque multiplier or you will damage the gears! I will break them loose with the torque multiplier and then set that tool aside while I spin them off with my cordless impact wrench. When reinstalling, I use my cordless impact to get them snug, then transfer over to the torque multiplier plus my ½” drive torque wrench to tighten them to the final torque specification. If you are going to do any tire or wheel work, pick up a wrench designed to remove the hubcap trim nut as well as a pliers with rubber grips that are designed to remove the plastic chrome acorn caps over the lug nuts.
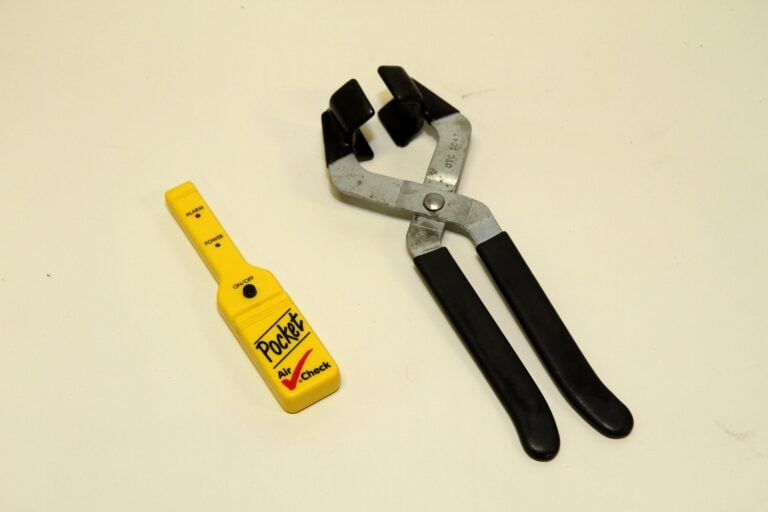
A rubber gripped pliers that is designed to remove the chrome plastic acorn nut covers will make the job go much easier without scratching the chrome covers.
The key is to match the tools to your ability to handle repairs and your desire to do it yourself. Eventually it’s time to call the professionals and let them do the task, but that point varies with each individual as well as the severity of the needed repair. And last, but not least: You’ll need to look the part. Wearing a ball cap with a Snap-On Tools logo will identify you as a serious professional.
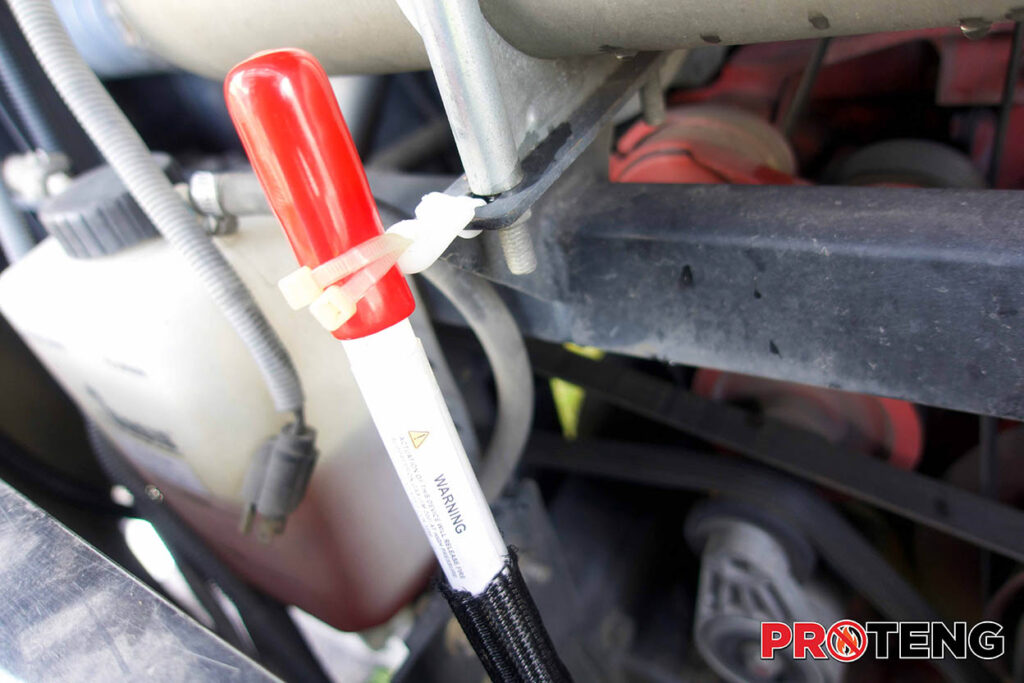
And last, but certainly not least, the fourth class of tools are those designed to take preventative measures, saving you from the hassle and dangers during specific but all too common situations. For example, installing a tire safety system like RettroBand® Wheel Enhancement can protect you and your RV during tire blowouts. Likewise, a fire suppression system such as THIA by Proteng can extinguish a fire before it ever has a chance to spread, saving lives, possessions and costly repairs. To learn more about these and other game-changing products, click here.
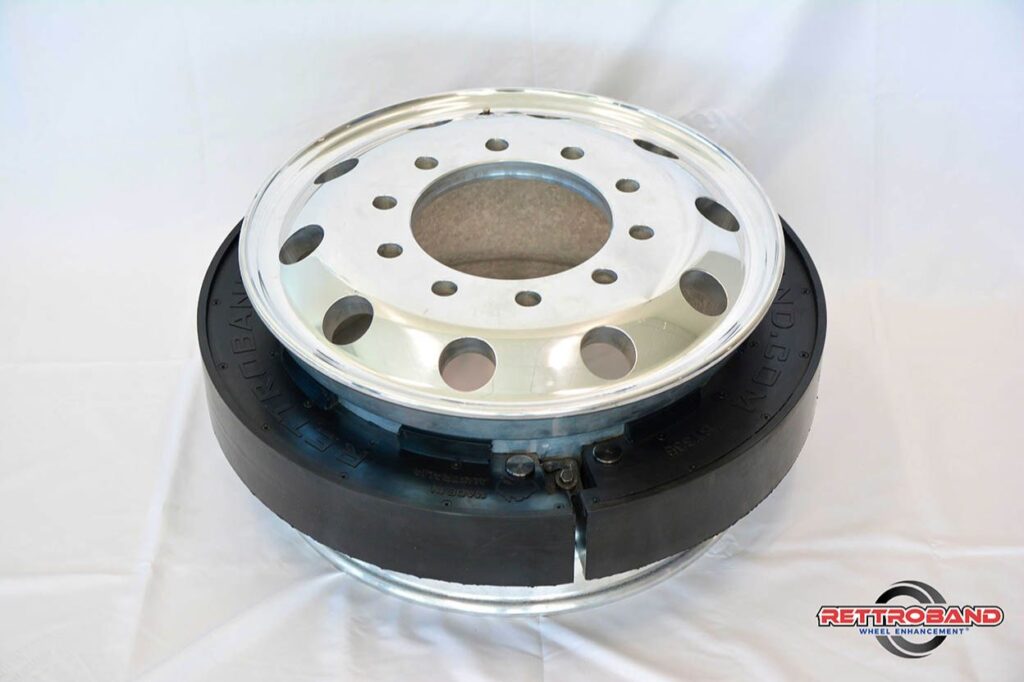
RettroBand offers a built-in spare that is engineered to withstand being driven on for short distances.
Completely self-contained and heat-activated, Proteng® is a fire suppression system minimizes fire damage by eliminating heat at the source, effectively extinguishing fire before it begins.

Mark Quasius is the founder of RVtechMag.com, the past Midwest editor of RV Magazine, writes for numerous RV-related publications and a regular Contributor to FMCA’s Family RVing Magazine. Mark and his wife Leann travel in their 2016 Entegra Cornerstone.